
Mastering the Fit
A Step-by-Step Guide to Putting on a Cloth Diaper
A proper fit is not just about avoiding leaks; it's about ensuring your baby is comfortable, happy, and ready to explore the world leak-free. Let's walk through the process of fitting a cloth diaper like a pro.
Fitting Tush Diapers
How to nail the perfect fit every time

Fitting Tush Diapers
How to nail the perfect fit every time
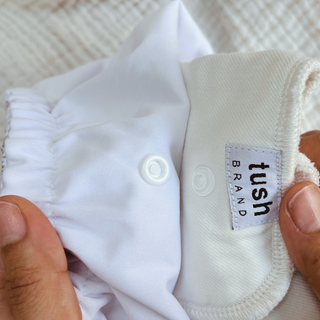
Step 1: Adjust the Rise Snaps
Before you even bring the diaper near your baby, start with adjusting the rise snaps according to your baby’s current size. If you're not sure which setting to use, refer to our handy snap adjustment guide—start smaller for infants and increase the size as your baby grows. These snaps tailor the diaper’s length and are crucial for a snug and comfortable fit.
Step 2: Snap the Inner into the Cover
Once your rise snaps are in place, snap the Inner into the Cover. This duo is the dynamic team that will keep moisture away from your baby's skin. Make sure the Inner is flat and properly aligned within the Cover to prevent any bunching or shifting.
Step 3: Lay Your Baby on the Diaper
With the diaper ready, lay your baby down on it so that the back of the diaper is level with their waist. Now, bring the front of the diaper up between your baby's legs. It should be snug but not too tight—think 'comfortably close' to ensure that it moves with your baby without constriction.

Step 4: Snap the Cover On
Next, it's time to snap the Cover on. Start with the bottom or thigh snaps to get a secure fit around the legs. Then, snap the waistband. The Cover must be snug to create a "seal" that will keep leaks contained. Remember, if it's too loose, it's not going to be effective.
Step 5: Check the Thighs for Gaps
After snapping the diaper, check for gaps around the thighs. Gaps are a sure sign that leaks will happen. The elastic should sit flush against your baby's skin, forming a gentle but secure seal.
Step 6: Waistband Test
Now, let's do the waistband test. You should be able to slip two fingers under the waistband of the Cover. If you can fit more than that, the Outer is too loose, and it's time for an adjustment.

Step 7: Inspect the Inner
Take a moment to ensure the Inner is not sticking out of the Cover in any place, especially around the back or the thighs. Any part of the Inner that's exposed can wick moisture onto clothing, leading to leaks.

Step 8: Rise Setting Troubleshooting
If you're experiencing leaks around the thighs, but your inserts aren't fully saturated, it's a good indicator that you need to adjust to a smaller rise setting. This adjustment can make all the difference in leak prevention.
Practice Makes Perfect
Fitting a cloth diaper properly can take a little practice, but once you've got the hang of it, it'll become second nature. Remember, every baby is different, so what works for one might not work for another. Don’t hesitate to experiment with different snaps and fits to find the perfect configuration for your little one.